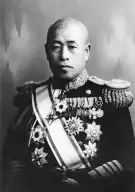
Admiral , Commander in Chief of the , takes stock of a victory as vast as it is fragile. In 4 months the Imperial Navy has struck and covered the conquest of Malaya and Singapore, and the Dutch East Indies surrendered in early March. His carriers are now operating off . Yet one obsession gnaws at him: the American Pacific carriers escaped on 7 December, and they have already struck the Marshall Islands and New Guinea.
In Tokyo, the Naval General Staff argues for a push south: take , then , and , to cut the route between the United States and Australia. The army, reluctant to commit large forces so far away, prefers to consolidate the conquered perimeter.
Yamamoto's staff has drawn up another plan: seize Atoll, some 2,000 kilometres from Hawaii, to force the American fleet out and destroy its carriers in a decisive battle. Tokyo objects that the atoll would be hard to hold and that the fleet would be exposed far from its bases.
Yamamoto must choose the line he will defend before the Naval General Staff: impose the attack on to provoke that decisive battle; rally to the push into the South Pacific to isolate Australia; or consolidate the perimeter already won without risking the fleet in a distant offensive.
Yamamoto forced the plan through: in early April 1942, faced with his thinly veiled threat to resign, the Naval General Staff gave way, securing in return that the operation would come first and the push toward and would be postponed. The Doolittle Raid on Tokyo on 18 April silenced the last objectors by exposing the vulnerability of the home islands. In May 1942 American codebreakers read the Japanese plan, and on 4 June the US Navy sprang the ambush at : in a single day 4 Japanese carriers were doomed, along with part of their seasoned crews. The offensive toward and was abandoned. The decisive battle Yamamoto had sought became the disaster that reversed the course of the Pacific War.




T10-042